This is the most delicious, creamy cheesecake I've ever made. I was so pleased that it didn't crack and I didn't have to use a water bath.


Ingredients

Graham Cracker Crust:

  • 1 ½ cups graham cracker crumbs (170g)
  • 2 Tablespoons sugar
  • 1 Tablespoon brown sugar (can substitute white)
  • 7 Tablespoons butter melted

Cheesecake:

  • 32 oz cream cheese softened to room temperature (910g)
  • 1 cup sugar (200g)
  • ⅔ cups sour cream (160g) - room temperature
  • 1 ½ teaspoons vanilla extract
  • ⅛ teaspoon salt
  • 4 large eggs room temperature (you will lightly scramble each egg before adding to batter)

Directions

Crust:
  1. Preheat oven to 325F (160C).
  2. Prepare the crust first by whisking together the graham cracker crumbs, sugar, and brown sugar. Add melted butter and use a fork to thoroughly mix the the ingredients. 
  3. Pour crumbs into a 9” springform pan and press firmly into the bottom and up the sides of the pan using a glass or measuring cup. 
  4. Place on a baking sheet and bake for about 10 minutes. 
  5. Remove from the oven and let cool while making the cheesecake filling.
Cheesecake:
  1. In the bowl of a stand mixer add cream cheese and stir until smooth and creamy (don’t over-beat or you will incorporate too much air).
  2. Add sugar and stir again until creamy.
  3. Add sour cream, vanilla extract, and salt, and stir until well-combined. Make sure you pause periodically to scrape the sides and bottom of the bowl with a spatula so that all ingredients are evenly incorporated.
  4. With mixer on low speed, gradually add lightly beaten eggs (lightly scramble each one with a fork before adding to the mixture), one at a time, stirring just until each egg is just incorporated. Over-beating the eggs can ruin the texture of the cheesecake and cause cracks. 
  5. Once all eggs have been added, use a spatula to scrape the sides and bottom of the bowl again and make sure all ingredients are well combined.
  6. Pour cheesecake batter into prepared springform pan. To insure against leaks, place pan on a cookie sheet that has been lined with foil.
  7. Transfer to the center rack of your oven and bake on 325F (160C) for 50-60 minutes (or longer as needed. I often put a glass pie pan of water on the bottom rack of the oven just to give some extra steam to the oven (this is not a water bath - the cheesecake pan does not go in it). Do not open the oven until it's finished baking (or close to it). You do have to check for doneness, but minimize opening the door as much as possible.
  8. Exact bake time can vary depending on your oven, whether you bake your cheesecake on a baking pan or not, the color of your springform pan (light or dark), and even the precise temperature of your ingredients. Because of this, check your cheesecake at 50 minutes and add time as needed. However, it is not uncommon for the cheesecake to take as long as 75 minutes to bake, but it's better to check sooner. Edges will likely have slightly puffed and may have just begun to turn a light golden brown and the center should spring back to the touch but will still be jiggly. Don't over-bake or the texture will suffer.
  9. Remove from oven and allow to cool on top of the oven (or other warm place in your kitchen) for 10 minutes. Once 10 minutes has passed, use a knife to gently loosen the crust from the inside of the springform pan (this will help prevent cracks as your cheesecake cools and shrinks). Do not remove the ring of the springform pan.
  10. Allow cheesecake to cool another 1-2 hours or until near room temperature before transferring to refrigerator and allowing to cool overnight or at least 6 hours. Remove the ring of the springform pan just before serving then return it to the pan to store. 


 This is a super quick soup to make that tastes way better than any canned store brand!


Ingredients:

  • 2 28 oz cans of Cento Crushed Tomatoes or Tomato Puree (my grocery store only carries the crushed)
  • 4 cups unsalted chicken stock
  • 1/2 teaspoon salt
  • 1/2 teaspoon black pepper
  • 2 teaspoons granulated garlic
  • 2 teaspoons granulated onion
  • 2 teaspoons paprika
  • 1 teaspoon dried basil
  • 1/2 teaspoon baking soda (helps cut through the acidity of the tomatoes)
  • 1 cup heavy cream

Whisk together the tomatoes, chicken stock, and seasonings in a large stock pot.
Bring to a boil, and then lower heat. Simmer covered for 20 minutes. 
Whisk in the baking soda. The soup will bubble up and fizz for a few seconds. Add the heavy cream and stir to combine until heated through. 

This is a great way to use up sourdough discard and make delicious waffles with no added sugar! I sometimes double the recipe when I have lots of discard to use and freeze the waffles for future use.


Ingredients:

  • 1 ½ cups unbleached all-purpose flour  (180g)
  • 2 tsp baking powder (9g)
  • 1 teaspoon salt (6g)
  • 2 eggs (100g)
  • ½ cup milk, plus more as needed (125g)
  • 8 ounces (weight) sourdough discard (227g)
  • 3 tablespoons butter, melted and cooled slightly (42g)

Directions:

Combine the ingredients for the batter in a very large bowl. Whisk ingredients together, adding extra milk if needed if batter is too thick.

Preheat waffle iron. Pour about ¼ cup to ½ cup of batter into waffle iron (the amount depends on the waffle iron - I use 1/2 cup for my Cuisinart waffle iron). Cook the waffle per the directions on your waffle iron. I usually add 30-60 seconds of cook time as I like them crispy.

Remove from the waffle iron, serve hot with your favorite toppings. 

Note: I freeze the extras for future use. Place the cooked waffles in a single layer on a baking sheet and freeze for about 4 hours, then transfer to a freezer bag. Reheat in the toaster or oven.

Makes 5 waffles in a Cuisinart classic waffle iron.

My mother-in-law makes this simple cheese sauce for broccoli and cauliflower. I like how quick and easy it is, and it's tasty as well.


Ingredients:

1 T butter
1T flour
1/2 cup milk
1/2 cup shredded cheddar

Directions:

  1. Melt the butter in a small pan, and whisk in the flour to make a roux. 
  2. Stir in the milk and cook over low heat until the mixture begins to thicken.
  3. Add in the shredded cheese and continue stirring until the cheese melts and the sauce is a nice consistency.
  4. The recipe is easily doubled for larger amounts of vegetables.


This is just a basic, plain oatmeal cookie recipe - no cinnamon, no chips, no raisin, no nuts - just the way I like it!


Ingredients:

1 1/2 cups all-purpose flour
1 teaspoon baking soda
1/2 teaspoon salt
1 cup (2 sticks) butter, softened
1/2 cup granulated sugar
3/4 cup packed brown sugar
2 large eggs
1 teaspoon vanilla extract
3 cups old-fashioned oats

Directions:

Preheat oven to 350° F.

Combine flour, baking soda, salt and in small bowl. 

Beat butter, granulated sugar and brown sugar in large mixer bowl until creamy. Add in the eggs and vanilla and mix well.  

Gradually beat in flour mixture. Stir in oats. 

Drop by rounded tablespoon onto ungreased baking sheets.

Bake for 8-10 minutes. Cool on baking sheets for 2 minutes; remove to wire racks to cool completely. 

 This is an amazing, flavorful easy-to-make soup.


Ingredients:

  • 1 teaspoon olive oil
  • ½ cup chopped onion
  • 2 garlic cloves, minced
  • 1 lb raw sweet Italian poultry sausage, casings removed 
  • 32 oz fat free low sodium chicken stock
  • 1 (28 oz) can unseasoned crushed tomatoes
  • 2 tablespoons chopped fresh basil
  • 2 teaspoons Italian seasoning
  • 1 teaspoon salt
  • 1/4 teaspoon black pepper
  • 3 oz 1/3 less fat cream cheese, cut into cubes
  • 12 oz refrigerated cheese tortellini
  • 2 cup fresh spinach
Directions:

  1. Heat the olive oil in a large soup pot over medium-high heat. Add the onions and stir to coat. Cook, stirring occasionally, for a few minutes until the onions are softened. 
  2. Add the minced garlic and cook for another 30-60 seconds. 
  3. Add the sausage to the pot, breaking the meat up into small pieces. Cook until the sausage is cooked through.
  4. Add the chicken stock, crushed tomatoes, basil, Italian seasoning, salt, and pepper. Turn heat to high and bring mixture to a boil. 
  5. Once boiling, reduce the heat to low and simmer, covered, for 20 minutes. 
  6. Uncover the pot and add the cream cheese. Whisk the cream cheese in while simmering until the cheese is dissolved. 
  7. Add the tortellini and spinach and stir together. Cover the pot and simmer for 10 minutes until pasta is cooked.


 A cassoulet is a rich, slow-cooked stew that originated in southern France. I'm probably pushing it to call this a cassoulet as it is not slow-cooked, but it does contain some of the traditional ingredients (white beans, sausage, garlic and herbs), and it makes this yummy, easy meal sound fancy. 


Ingredients:

  • 1 tablespoon olive oil
  • 2 pounds boneless skinless chicken breasts, cut into one-inch cubes
  • 1/2 teaspoon paprika
  • salt and pepper, to taste
  • 13 oz package of turkey smoked sausage (I prefer this to pork to keep fat and calories a little lower), sliced into quarter-inch thick circles
  • 2 teaspoons minced garlic
  • 1 teaspoon dried thyme leaves
  • 1/2 teaspoon pepper
  • 1/2 cup dry white wine
  • 2 tablespoons tomato paste
  • 2 15oz cans great northern or cannellini beans, rinsed and drained
  •  1 cup no salt added chicken stock
  • 2 tablespoons chopped fresh parsley
Directions:
  1. In a large nonstick skillet (needs to be fairly deep), heat the tablespoon of olive oil over medium-high heat. 
  2. Season the chicken with the paprika, salt and pepper, and add to the pan.
  3. Cook about 5 minutes or until cooked through, stirring frequently.
  4. Scoot the chicken to one side of the skillet and add in the in the sliced sausage pieces. Cook for about 5 minutes.
  5. Add in the garlic, stirring everything to combine. Cook for about 30 seconds.
  6. Season the mixture with the thyme and pepper. 
  7. Add wine and tomato paste and stir until combined.
  8. Add the beans and chicken stock.
  9. Simmer on low heat for 10-15 minutes.
  10. Sprinkle with fresh parsley before serving. 
Makes about 6 servings

My family members know that I tend to be a vanilla ice cream kind-of-girl. Even though I love chocolate in general (cookies, cakes, brownies, etc.), it's just not my go-to for ice cream. But this chocolate ice cream is amazing and is worth making an exception. It is creamy and yummy and definitely hits the spot when you have a chocolate craving. It's kind of a complicated process as it is a custard style base that takes some time and preparation, but it's worth the work. I suggest starting in the morning on the day before you want to serve it. That way the ice cream base has plenty of time to chill in the refrigerator before you churn it, and then you can freeze it overnight before serving the following day.

Ingredients:

  • 3/4 cup granulated sugar, divided
  • 3 Tbsp Dutch cocoa powder
  • 1 1/2 cups heavy cream
  • 1 1/2 cups whole milk
  • 1/4 cup corn syrup
  • 4 oz. bittersweet chocolate, chopped
  • 4 large egg yolks
  • 2 tsp pure vanilla extract

Directions:
  1. Whisk together 1/2 cup sugar and 3 tablespoons of cocoa powder in a medium saucepan. Whisk in the cream, milk and corn syrup and simmer over medium heat (will bubble at the edges of the pan).
  2. In a microwave safe bowl, melt the chocolate on 50% power in 30 second increments, stirring in between each cycle, until the chocolate is melted. Let it cool slightly.
  3. In a medium Pyrex or other heatproof bowl, whisk together the remaining 1/4 cup sugar with the egg yolks until the mixture is slightly pale in color and fluffy (about 1-2 minutes). 
  4. Stir in the melted chocolate. The mix will thicken and set a bit.
  5. While continuously whisking, slowly pour 1 cup of the hot milk mixture from the pan on the stove into the egg yolk mixture in the Pyrex bowl.
  6. Now pour this egg yolk mixture into the pan on the stove while vigorously whisking.
  7. Continue to cook the chocolate custard mixture, stirring constantly, until the mixture has thickened slightly (should coat the back of a spoon) and registers 175-180 degrees on an instant-read thermometer. 
  8. Pour the mixture into a large Pyrex or other heatproof mixing bowl, and stir in the vanilla extract.
  9. Cover the mixture with plastic wrap, carefully pressing it against the surface of the ice cream mixture to prevent a skin from forming on top.
  10. Chill the ice cream mixture in the refrigerator until completely cooled, for at least six hours.
  11. Churn the ice cream mixture in your ice cream maker according to the manufacturer's directions.
  12. Transfer to a container, cover, and freeze in the freezer until firm, about 6-12 hours.

Note: If you want to add mix-ins like chocolate chips, peanut butter cups, etc., just add them in during the last couple minutes of churning.


When I go to local artisan ice cream shops, I often gravitate toward fruit flavored cheesecake ice cream. Now that I have finally gotten smart and purchase an ice cream maker for home, I thought it was time to make one of my favorites. This is the BEST blueberry cheesecake ice cream. It is rich and creamy and fruity, and the hint of graham crackers really make this reminiscent of  cheesecake. 


Ingredients:

  • 1 pint fresh blueberries (about 2 cups) 
    • Note: You can use frozen blueberries, but you need to thaw them first and drain away any liquid
  • 1 cup granulated sugar, divided
  • 1 teaspoon cornstarch
  • 1 tablespoon water
  • 8 ounces cream cheese, softened
  • 2 cups heavy cream
  • 1 cup whole milk
  • 1 teaspoon pure vanilla extract
  • ½ tsp kosher salt
  • 1 cup chopped graham crackers
Directions:

Make the blueberry compote:
  1. Freeze your ice cream maker bowl for 24 hours before making the ice cream.
  2. In a medium sauce pan, combine the blueberries and 1/4 cup sugar and bring to a boil. 
  3. Reduce the heat to a summer and cook for about 10 minutes or until the berries have broken down.
  4. Whisk together the cornstarch and tablespoon of water to make a slurry.
  5. Add the cornstarch slurry to the berry mixture and cook for 1-2 minutes until slightly thickened.
  6. Remove the berry compote from heat and transfer to a small glass bowl to cool. Make sure you cover the container once it has cooled a bit, and cool completely in the refrigerator before using.
Make the ice cream base:
  1. Using a stand mixer with a whisk attachment, add the cream cheese and 3/4 cup sugar to the mixing bowl and beat until light and fluffy, about one minute.
  2. Turn the mixer speed to low and very slowly drizzle in the cream, milk, vanilla extract and salt.
  3. Mix until completely smooth to avoid lumps of cream cheese.
  4. Transfer the ice cream base to the refrigerator and chill for 30 minutes (can leave it overnight).
  5. After the base is chilled for at least 30 minutes, churn the mixture in the bowl of your ice cream machine according the manufacturers directions (probably 18-20 minutes).
Layer the ice cream ingredients:
  1. Once the ice cream is finished churning, transfer 1/3 of the base into a shallow ice cream container or a loaf pan. 
  2. Drizzle 1/3 of the blueberry compote over the ice cream. Sprinkle 1/3 of the graham crackers over the sauce.
  3. Repeat these steps tow more times with the remaining ice cream, blueberry compote, and graham crackers.
  4. Swirl the ingredients together with a butter knife to distribute the berries and crackers throughout the ice cream.
  5. Cover the pan tightly with plastic wrap and freeze for at least 4 hours. 
  6. Let it sit at room temperature for about 10 -15 minutes before scooping.


 Oatmeal cookies are one of those things that when I think about making them, I always think "boring", and end up not making them. I forget how much I actually love them. I LOVE a good thin, chewy oatmeal cookie with nothing added in - no chips, and definitely no raisins. This recipe makes the perfect chewy oatmeal cookie. Do be aware that they spread a lot when cooking, so don't put more than 8 on a large baking sheet. 


Ingredients:

1 cup unsalted butter
2 cups sugar (400 g)
2 eggs
1 1/2 tablespoons honey
2 teaspoons vanilla
2 cups flour (240 g)
1 1/2 teaspoon cinnamon
1/2 teaspoon salt
1 1/2 teaspoons baking soda
2 cups quick cook oats (178 g)

Directions:

  1. Preheat oven to 350 degrees F. 
  2. Using a stand mixer, beat together the butter and sugar until smooth and creamy.
  3. Add in the eggs one at a time.
  4. Add in the honey and vanilla and mix in until well combined.
  5. In a separate bowl, whisk together the flour cinnamon, salt, and baking soda.
  6. Add the dry ingredients in to the wet ingredients in batches on slow speed until combined.
  7. Mix in the oats until combined.
  8. Using a 2 T cookie scoop, scoop dough onto baking sheet lined with parchment paper. Make sure they are spread apart as they really spread when cooking. I put 8 on a large baking sheet. If you want smaller cookies, use a small (1 T) cookie scoop.
  9. Bake for 8 - 10 minutes.
  10. Let cookies cool on baking sheet for 3 minutes before transferring to a cooling rack to cool completely.
Makes about 3 dozen large cookies.

This is a little different twist on the traditional thumbprint cookie. Usually these cookies are filled with some flavor of jam. Instead of jam, these are filled with creamy caramel and topped with a milk chocolate swirl. 


Ingredients:

1 cup unsalted butter, softened
¾ cup sugar
1 large egg at room temperature
1 egg yolk at room temperature
½ teaspoon vanilla extract
2⅔ cups all purpose flour
¼ teaspoon salt
24 Kraft wrapped caramels
½ cup heavy whipping cream
½ cup milk chocolate chips

Directions:

  1. Preheat the oven to 350°F
  2. In a large bowl, cream together the softened butter and sugar with an electric mixer until creamy and light in color
  3. Add in the whole egg and mix until combined. Next add the egg yolk and vanilla and beat until just combined.
  4. In a separate bowl, whisk together the flour and salt.
  5. Slowly add the flour and salt to the wet ingredients  and mix until you get a smooth dough.
  6. Line a cookie sheet with parchment paper. Using a small cookie scoop (1 tablespoon size), scoop out the cookie dough, and roll each scoop into a ball. 
  7. Place the balls on the parchment, and press the center of the cookie down with the back of a teaspoon. Repeat with all of the cookies.
  8. Put the cookies on the baking sheets into the freezer and freeze for 30 minutes to help keep the dough from spreading when baked.
  9. Bake the cookies for 15-16 minutes. Keep the cookies that you are not baking in the freezer until ready to put in the oven.
  10. If the center of the cookies have risen after baking, use the teaspoon to press down the centers. 
  11. Transfer the cookies to a cooling rack to cool.
  12. Place the caramels and the heavy whipping cream in a small saucepan over low heat. Stir constantly until the caramel has melted and the mixture is smooth.
  13. Spoon about a teaspoon of caramel into the cookies. If the caramel starts to set, reheat on low. 
  14. Put the chocolate chips in a microwave safe bowl and heat in 30 second increments to melt the chips, stirring after each 30 second interval until smooth and melted.
  15. Transfer the chocolate into a  piping bag, cut off the tip, and drizzle over the cookies. Allow the chocolate to set before serving. I put them in the refrigerator to speed up this process.


These are super cute cookies decorated to look like a snowman. These would be perfect to make if you have little helpers at home that would have fun decorating the face. 


Ingredients:

3/4 cup unsalted butter, softened
1 1/2 cups sugar
2 large eggs
2 teaspoons vanilla extract
2 3/4 cups all-purpose flour
1/2 teaspoon salt
1/2 teaspoon baking powder

4 cups powdered sugar
2-6 tablespoons milk

2 cups unsweetened coconut
1/4 cup mini chocolate chips
Orange M&Ms or Sixlets (could also sub orange frosting if you can't fine orange candies)

Directions:

  1. Preheat oven to 350 degrees F. 
  2. In a large bowl, use a mixer to beat together the butter and sugar until creamy and light in color.
  3. Add the eggs one at a time to the butter/sugar mixture and mix until combined.
  4. Add in the vanilla extract.
  5. In a separate bowl, whisk the flour, salt, and baking powder together. 
  6. Slowly add the flour mixture into the wet mixture until well combined.
  7. Line a baking sheet with parchment paper.
  8. Use a small cookie scoop (1 tablespoon size) to scoop dough. Roll each scoop into a ball and place onto the prepared baking sheet.
  9. Using the bottom of a drinking glass or the palm of your hand, flatten each ball to about 1/4 inch thick.
  10. Bake for 10 minutes. 
  11. Cool for 2-3 minutes on the pan before transferring to a wire cooling rack to finish cooling.
  12. While the cookies are cooling, make the frosting by stirring the milk into the powdered sugar. Start with a couple of tablespoons of milk, and then add more as needed to get the desired consistency. You want it to be thick enough that it sticks to the cookies, but not so thin that it will run down the sides of the cookie when you dip it in the frosting. Set aside.
  13. Put the coconut in  a wide, shallow bowl. Put the mini chocolate chips into a small bowl, and the orange candies in a small bowl. Set these aside until ready to assemble the cookies.
  14. You will decorate one cookie at a time. First, dip the cookie facedown into the frosting. Lift the cookies straight up and allow the excess frosting to fall back into the bowl. You might need to shake the cookie gently to help get rid of that excess. 
  15. Next, while holding the cookie by the sides, use your free hand to generously sprinkle the coconut over the top, allowing the excess to fall back into the bowl. Shake off the excess coconut.
  16. Place the cookie back onto the cooling rack and top it with two mini chocolate chips for eyes and five mini chocolate chips for a mouth. Place an orange candy in the middle for a nose.
  17. Continue this process with all of the cookies.
  18. Allow frosting to fully dry before storing the cookies.
Makes just under 4 dozen cookies

One of my favorite holiday treats is a chocolate orange. You know, the candy that is in the shape of an orange that you smack on the table to get the slices to break apart. I love the subtle flavor orange mixed with the dark chocolate candy. These cookies are reminiscent of that holiday candy treat. The batter has a nice orange flavor that goes great with the chocolate chips.


Ingredients:

1 cup unsalted butter, softened
1¼ cup brown sugar
1 cup granulated sugar
2 large eggs, room temperature
2 tablespoons fresh orange zest
2 teaspoons vanilla extract
2 teaspoons orange extract
3 cups all-purpose flour
1½ teaspoons cornstarch
1½ teaspoons baking powder
½ teaspoon baking soda
½ teaspoon salt
3 cups semi-sweet chocolate chips

Directions:

  1. Preheat oven to 375 degrees F.
  2. In a large mixing bowl, use a stand mixer to beat the butter until smooth. 
  3. Add in the white and brown sugar, mixing on high until smooth and creamy.
  4. On low speed, mix in the eggs, one at a time until well combined.
  5. Add in the orange zest, vanilla and orange extract and mix until combined. 
  6. In a separate bowl, whisk together the flour, cornstarch, baking powder, baking sod, and salt.
  7. Add the flour mixture in small batches to the wet ingredients and mix at low speed until well combined. 
  8. Stir in the chocolate chips.
  9. Refrigerate the dough for two hours.
  10. Line baking sheets with parchment paper.
  11. Use a small cookie scoop (1 T size) to scoop dough onto trays, 2 inches apart. 
  12. Bake for 10 minutes. Allow cookies to cool on baking sheets for 2 minutes before transferring to wire rack to cool completely.

Makes about 8 dozen small cookies. 

Oftentimes, cookies at a fast-food restaurant are not that great. But the cookies at Chick-fil-A are the exception. Their cookies almost always come to you warm and gooey. They are thick and chewy (thanks to the oats in them) and are full of chocolate chunks. This recipe is as good as, if not better than the originals from the restaurant. You can freeze them, and then when you have a hankering for one, just microwave it for 10 seconds and enjoy a tasty treat!


Ingredients:

1/2 cup unsalted butter, softened
1/2 cup butter-flavored Crisco
1 1/2 cups dark brown sugar, packed
1/2 cup granulated sugar
2 large eggs
1 tablespoon vanilla extract
2 3/4 cup all purpose flour
1 teaspoon baking soda
1/2 teaspoon baking powder
1/2 teaspoon salt
1 cup quick cooking oats (you can also use old fashioned, but I prefer the quick cooking)
12 ounce bag Nestle semisweet chocolate chunks
1/2 cup milk chocolate chips

Directions:

  1. Preheat oven to 350 degrees.
  2. In the mixing bowl of your stand mixer, cream the butter, Crisco, dark brown sugar and white sugar
  3. Mix in the eggs one at a time. 
  4. Mix in the vanilla.
  5. In a separate medium bowl whisk together the flour, baking soda, baking powder and salt. 
  6. Slowly add the flour mixture to the wet ingredients and mix until combined.
  7. Stir in oats.
  8. Fold in the chocolate chunks and chocolate chips.
  9. To get the thick texture of the original Chick-fil-A cookie, you are going to put two scoops of cookie dough to make each cookie. Use a medium cookie scoop (2 T) to scoop the cookie dough and stack two cookie dough balls, one on top of the other like you are making a snowman, on cookie sheets lined with parchment paper. I put 6 cookies per sheet to make sure they have enough room to spread out.
  10. Bake cookies for 11-13 minutes. If your cookies are odd shaped, you can use a large cookie cutter and kinds of swirl it around the warm cookies right when they come out of the oven to get a nice round shape.
  11. Cool the cookies on the baking sheet for 5 minutes. Transfer to a wire rack to cool. 
Makes 24 cookies

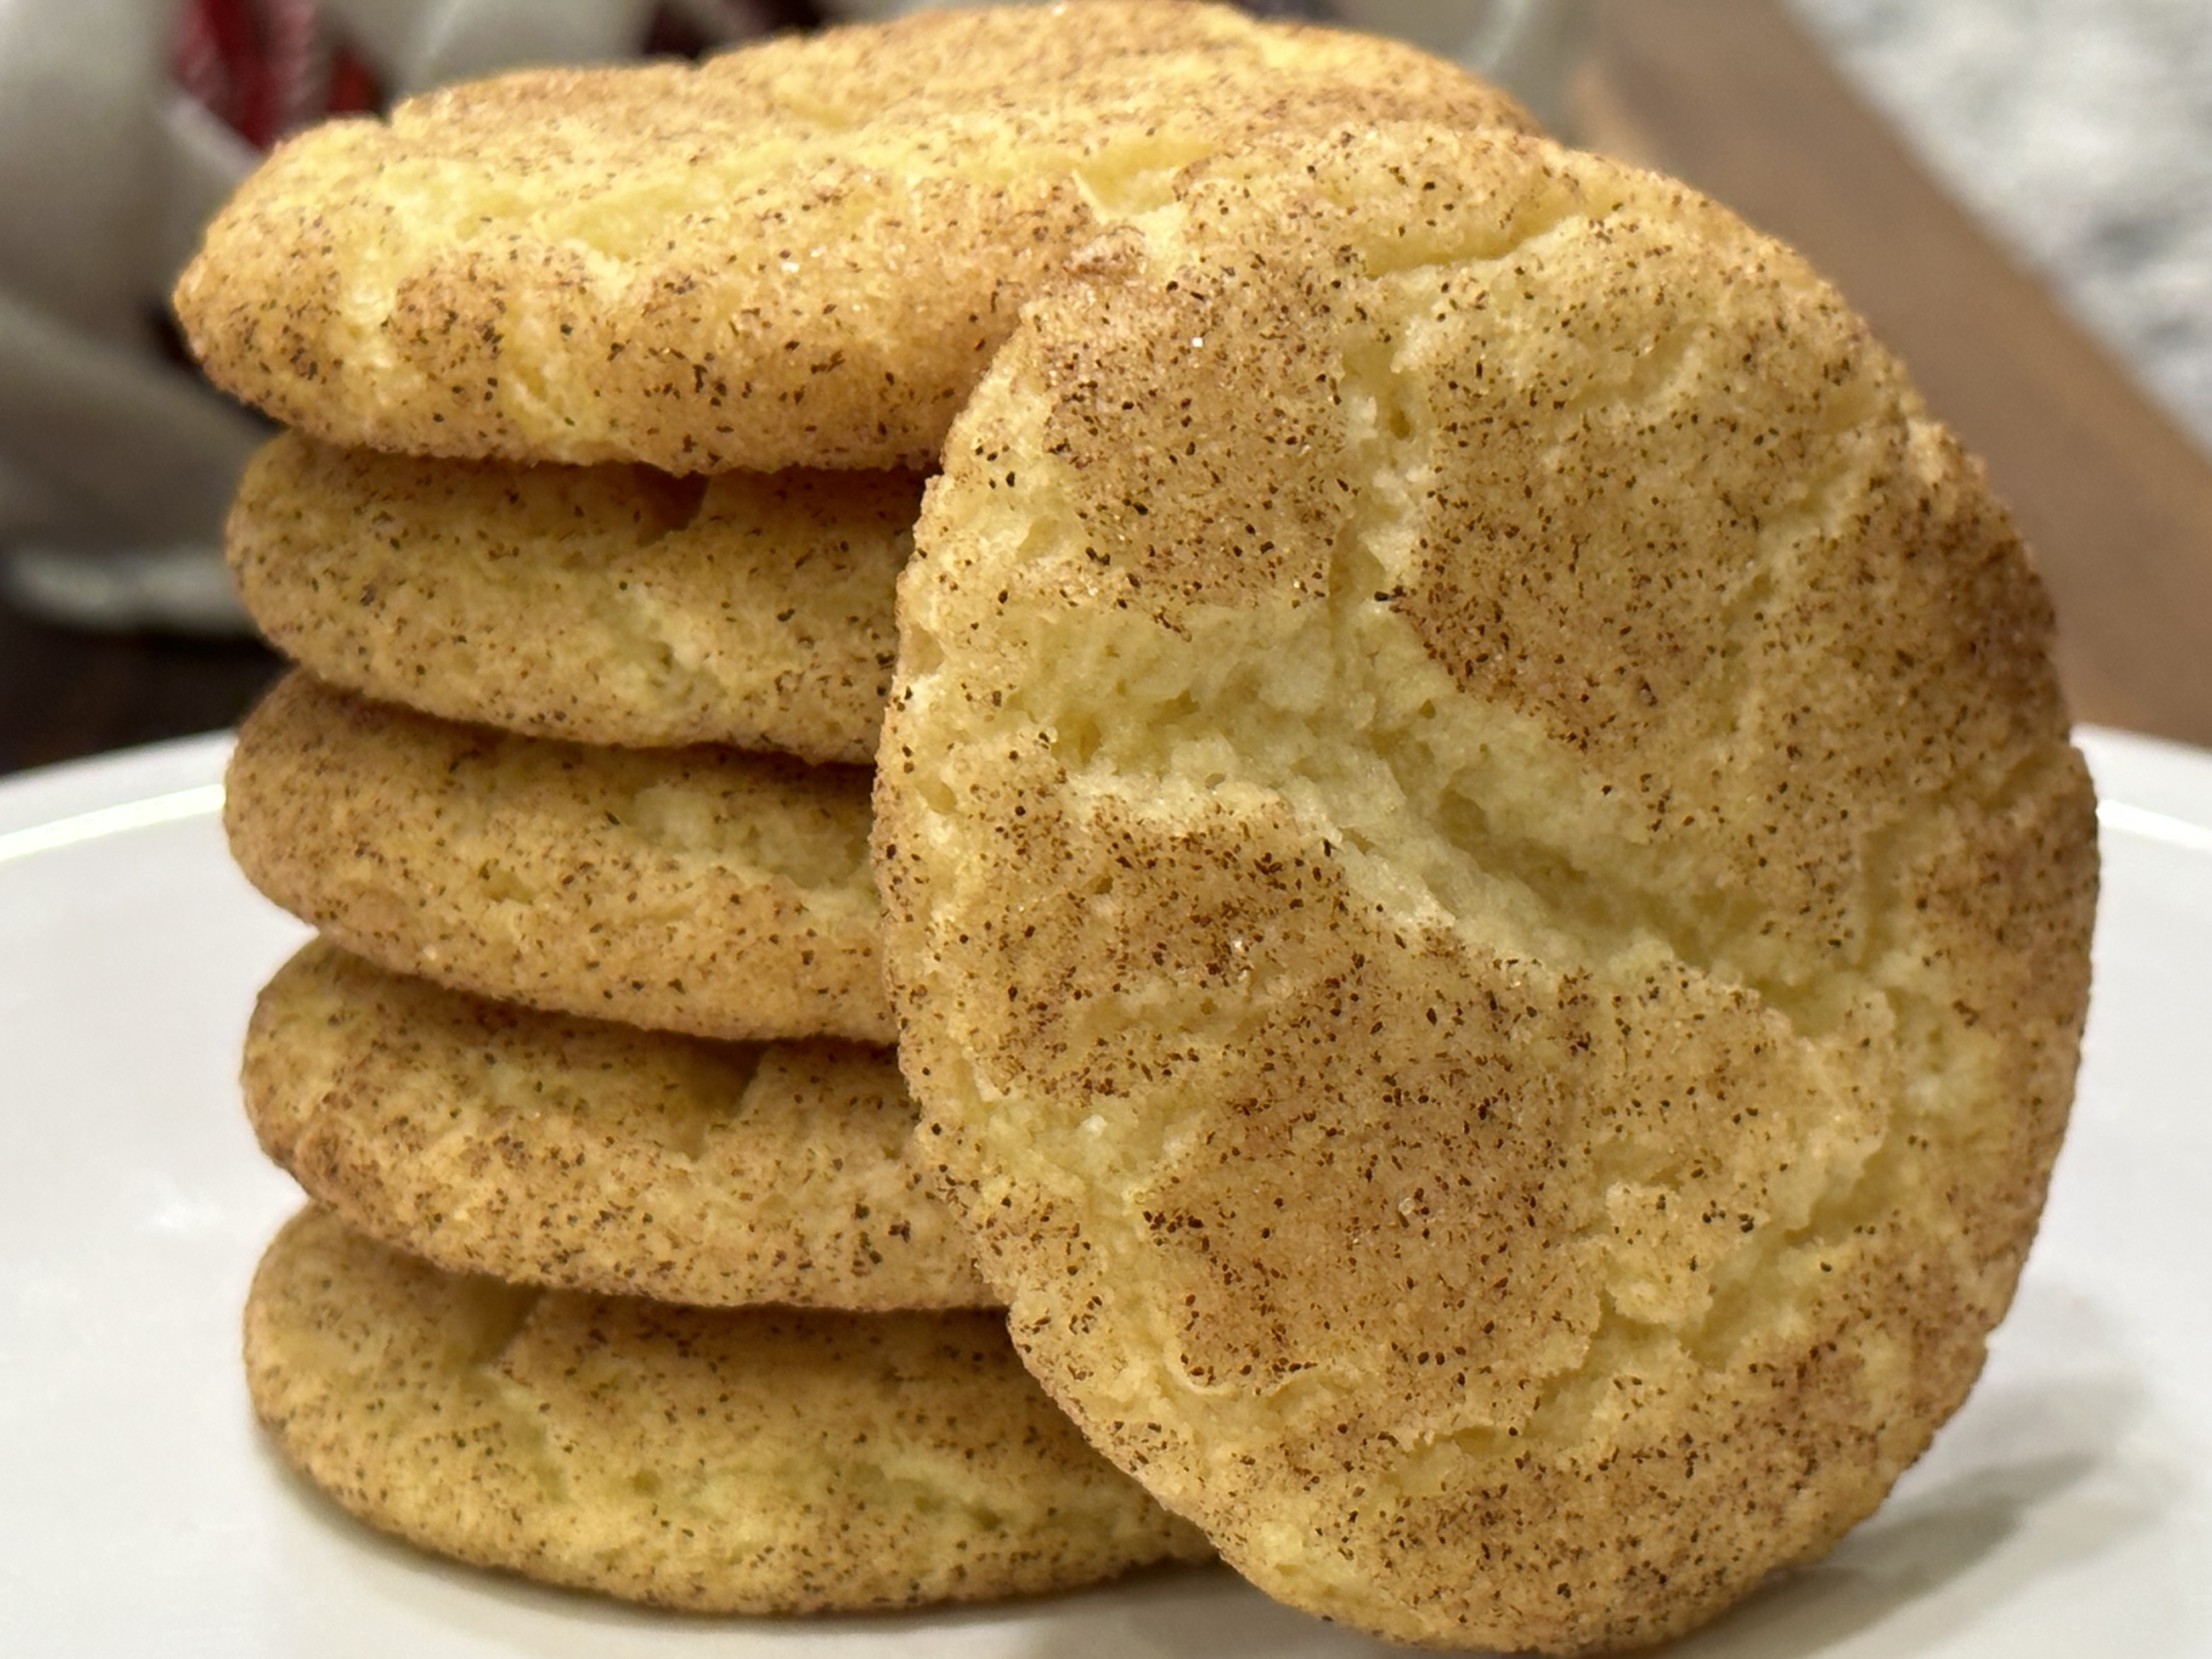
 A lot of times, I don't really care for snickerdoodles. I know, that's a controversial thing to say, as most people love these classic cookies. But often they are very cakey, which I just don't care for in a cookie. But, that's not the case with this recipe. These are the ultimate snickerdoodle cookies! The combination of using butter and shortening gives them an amazing chewy texture that I just crave in a cookie. These snickerdoodles taste especially wonderful warm out of the oven.


Ingredients:

1/2 cup unsalted butter, softened
1/2 cup butter flavored Crisco 
1 1/2 cups plus 2 tablespoons sugar
2 medium eggs
2 3/4 cups all-purpose flour
2 teaspoons cream of tartar
1 teaspoon baking soda
1/2 teaspoon fine salt
2 teaspoons ground cinnamon

Directions:

  1. Preheat the oven to 400 degrees F.
  2. In a large bowl, combine the butter, shortening, 1 1/2 cups sugar and the eggs and mix thoroughly with an electric mixer on medium speed until creamy and well combined, 1 to 2 minutes. 
  3. Whisk together the flour, cream of tartar, baking soda and salt, and stir into the butter mixture.
  4. In a small bowl, stir together the remaining 2 tablespoons sugar with the cinnamon.
  5. Shape the dough into 1 1/2-inch balls (1 tablespoon per ball), and roll each ball in the cinnamon-sugar. 
  6. Arrange the dough balls 2 inches apart on ungreased cookie sheet. Bake until the edges of the cookies are set but the centers are still soft, 8 to 10 minutes.
Makes about 4 dozen cookies

 You can't go wrong with chocolate and peanut butter! When planning for this recipe, be aware that you do have to chill the doughs for about 30 minutes before baking.


Ingredients:

For the peanut butter dough:

1/2 cup unsalted butter, softened
1/2 cup creamy peanut butter
1/2 cup granulated sugar
1/2 cup brown sugar
1 large egg
1 tsp vanilla extract
1 1/4 cup flour
1/2 tsp baking soda
1/2 tsp baking powder
1/4 tsp salt
3/4 cup chocolate chips

For the chocolate dough:

1/2 cup unsalted butter, softened
1/2 cup granulated sugar
1/2 cup brown sugar
1 large egg
1 tsp vanilla extract
1 1/4 cup flour
6 TBS cocoa powder (I like the darker, Dutch-process)
1/2 tsp baking soda
1/2 tsp baking powder
1/4 tsp salt
3/4 cup chocolate chips

Directions:

To make the Peanut Butter Cookie Dough:

  1. Cream together the butter, peanut butter, and sugars in a large bowl. 
  2. Add in the egg, and vanilla extract and stir until just combined.
  3. Add in the flour, baking soda, baking powder, and salt and stir into the mixture until well combined. 
  4. Fold in the chocolate chips.
  5. Cover and refrigerate the dough for at least 30 minutes.

To make the Chocolate Cookie Dough:

  1. Cream together the butter, and sugars in a large bowl. 
  2. Add in the egg, and vanilla extract and stir until just combined.
  3. Add in the flour, cocoa powder, baking soda, baking powder and salt and stir to combine.
  4. Fold in the chocolate chips.
  5. Cover and refrigerate the dough for about 30 minutes.

To make the Cookies:

  1. Preheat the oven to 350 degrees Fahrenheit. Line a baking sheet with parchment paper or a nonstick liner like a Silpat.
  2. Remove both doughs from the refrigerator. Take about 1 TBS of each dough and squish them together and then roll them up into a ball. The peanut butter dough will be softer than the chocolate dough. Don't worry about it. They do just fine together. :) 
  3. Place the cookie balls onto the prepared cookie sheet, at least 2 inches apart each.
  4. Bake the cookies for about 9 to 12 minutes, or until the edges are set and the tops have started to crack.
  5. Let the cookies cool for about 5 minutes on the cookie sheet before transferring to a cooling rack to cool completely. To make them look picture perfect, add a few extra chocolate chips to the top of the cookies right after removing them from the oven. 
Makes just under 4 dozen cookies 

 A delicious chocolate cookie topped with minty green icing and chocolate ganache glaze. Yum! Do note that you have to chill the dough 45 minutes before baking.


Ingredients:

For the Cookies:

1 cup melted butter 2 sticks
1/2 cup unsweetened cocoa powder
1 cup brown sugar
1/2 cup white sugar
1 teaspoon vanilla extract
2 large eggs
1 teaspoon baking soda
1/2 teaspoon salt
2 1/4 cups all-purpose flour

For the Mint Frosting:

1/2 cup butter softened
3 cups powdered sugar
3-4 Tbsp. milk
1 1/4 teaspoons peppermint extract
green food coloring (a few drops)

For the Chocolate Ganache Glaze

8 oz. semi-sweet chocolate chips
3 Tbsp. milk
4 teaspoons butter
4 teaspoons honey or corn syrup

Directions:

  1. Combine melted butter and cocoa powder in a large bowl and mix. Add sugars and mix until smooth. Add eggs and vanilla. 
  2. In a separate bowl, whisk together the flour baking soda, and salt. Slowly mix into the wet mixture and mix until combined.
  3. Chill cookie dough in the refrigerator for 45 minutes to an hour.
  4. Preheat oven to 350 degrees.
  5. Scoop cookie dough onto a parchment paper-lined cookie sheet and bake for 10 minutes.
  6. Let the cookies sit on the baking sheets for a couple of minutes, and then transfer the cookies to a cooling rack to cool completely.
  7. After the cookies have cooled, put the cookies back on a cool cookie sheet. Put as many on the sheet as you can to help save space in your fridge when cooling the frosted/glazed cookies. 
  8. Beat frosting ingredients together. Add a few drops of green food coloring to get a color you like and mix thoroughly. Spread over cookies then refrigerate cookies for 15-20 minutes. This will chill the frosting and keep it stable when you pour the warm chocolate glaze over them.
  9. Heat glaze ingredients in a microwave-safe bowl for 30 seconds. Stir. Heat for an additional 15-20 seconds. Stir until smooth and creamy. If additional time is needed do it in 10-second increments. 
  10. Spoon glaze over cookies.
  11. Allow glaze to set up (placing cookies back into the refrigerator or freezer for 15-20 minutes will speed this up).
  12. Cookies can be stored at room temperature or refrigerated.
Makes just over 5 dozen cookies

These cookies taste just like your favorite brownie! They even have the iconic crackled top. They are chocolatey and chewy and go great with a glass of milk. Everything is mixed by hand, so no electric mixer required.


Ingredients:

8 oz semi sweet baking chocolate (not chips, but Bakers semi sweet bars that you find in the baking aisle)
1/4 C salted butter (if you only have unsalted, add 1/4 t more salt to the dry ingredients)
1/2 C all purpose flour
2 tbsp cocoa powder
1/2 tsp baking powder
1/4 tsp salt
1/2 C brown sugar
1/2 C white sugar
2 large eggs at room temperature
1 tsp vanilla extract


Directions:

  1. Preheat oven to 350 F and line baking pans with parchment paper.
  2. Break up the Bakers chocolate into small pieces and place in a microwave safe bowl with the butter. Microwave in 20 second increments (stirring in-between) until melted. Set aside.
  3. Whisk together flour, cocoa powder, baking powder, and salt in another bowl. Set aside.
  4. In a large bowl whisk by hand the brown sugar, white sugar, and eggs for 5 minutes. Don't skimp on the step. It's what helps give the cookies their shiny crackled tops.
  5. Add the melted chocolate/butter and vanilla to the egg/sugar mixture and whisk until combined.
  6. Add in the flour mixture and mix with a rubber spatula just until the flour is all mixed in. The dough will be very soft and will remind you of brownie batter or chocolate frosting.
  7. Use a medium cookie scoop to scoop dough onto the parchment-covered baking sheets, placing them 2 inches apart.
  8. Bake for 9 minutes or until cookies are set on the edges and has a crackled top. They will still look soft in the middle but will firm up after cooling. Fully cool the cookies on the pan before removing them to serve. 

 This is a twist on the traditional peanut butter blossom cookie. You know, the peanut butter cookies with a chocolate kiss pressed in the middle that everyone makes at Christmas. I wanted to make some treats for the librarians and nurses that my dog Jasper and I visit to do pet therapy, so I thought turning those traditional cookies into "puppy paws" would be fun. They are very tasty, and they were definitely a hit with our pet therapy clients. 


Ingredients:

1/2 cup butter, softened
1 cup creamy peanut butter (I used No Sugar Added Jif)
1 cup granulated sugar
1/2 cup packed light brown sugar
2 large eggs
1/2 teaspoon vanilla extract
2 cups all purpose flour
2 teaspoons baking soda
1/2 teaspoon salt

1/2 cup sugar for rolling cookies (approximate amount - may need more or less)
1 10z pkg of Ghirardelli Dark or Milk Chocolate Melting Wafers (you will not use all of  them)
1 pkg of Nestle Semi-Sweet chocolate chips (you will not use all of them)

Directions:

1. Preheat oven to 350°F.

2. In a large mixing bowl, beath together the butter, peanut better, sugar and brown sugar using a stand mixer or electric hand mixer until ingredients are smooth and creamy.

3. Add the eggs (one at a time) and vanilla and mix until combined.

4. In a separate bowl, whisk together the flour, baking soda, and salt.

5. Slowly add the flour mixture to the peanut butter mixture and mix on slow speed until just combined.

6. Using a small cookie scoop (1 T size), scoop dough and then roll into a ball. Roll ball in sugar. Place sugar-covered dough balls on a cookie sheet about 2 inches apart.

7. Bake for 7-9 minutes. The cookies will still be a bit puffy when you remove them, so don't worry about that.

8. Press 1 chocolate wafer into the bottom center of each cookie. Add 4 chocolate chips, pointed side down, above the wafter to look like the toes of the paw print.

9. Cool cookies on a wire rack to let the chocolate set before storing them or stacking them. These do freeze well.

Makes about 4 dozen cookies


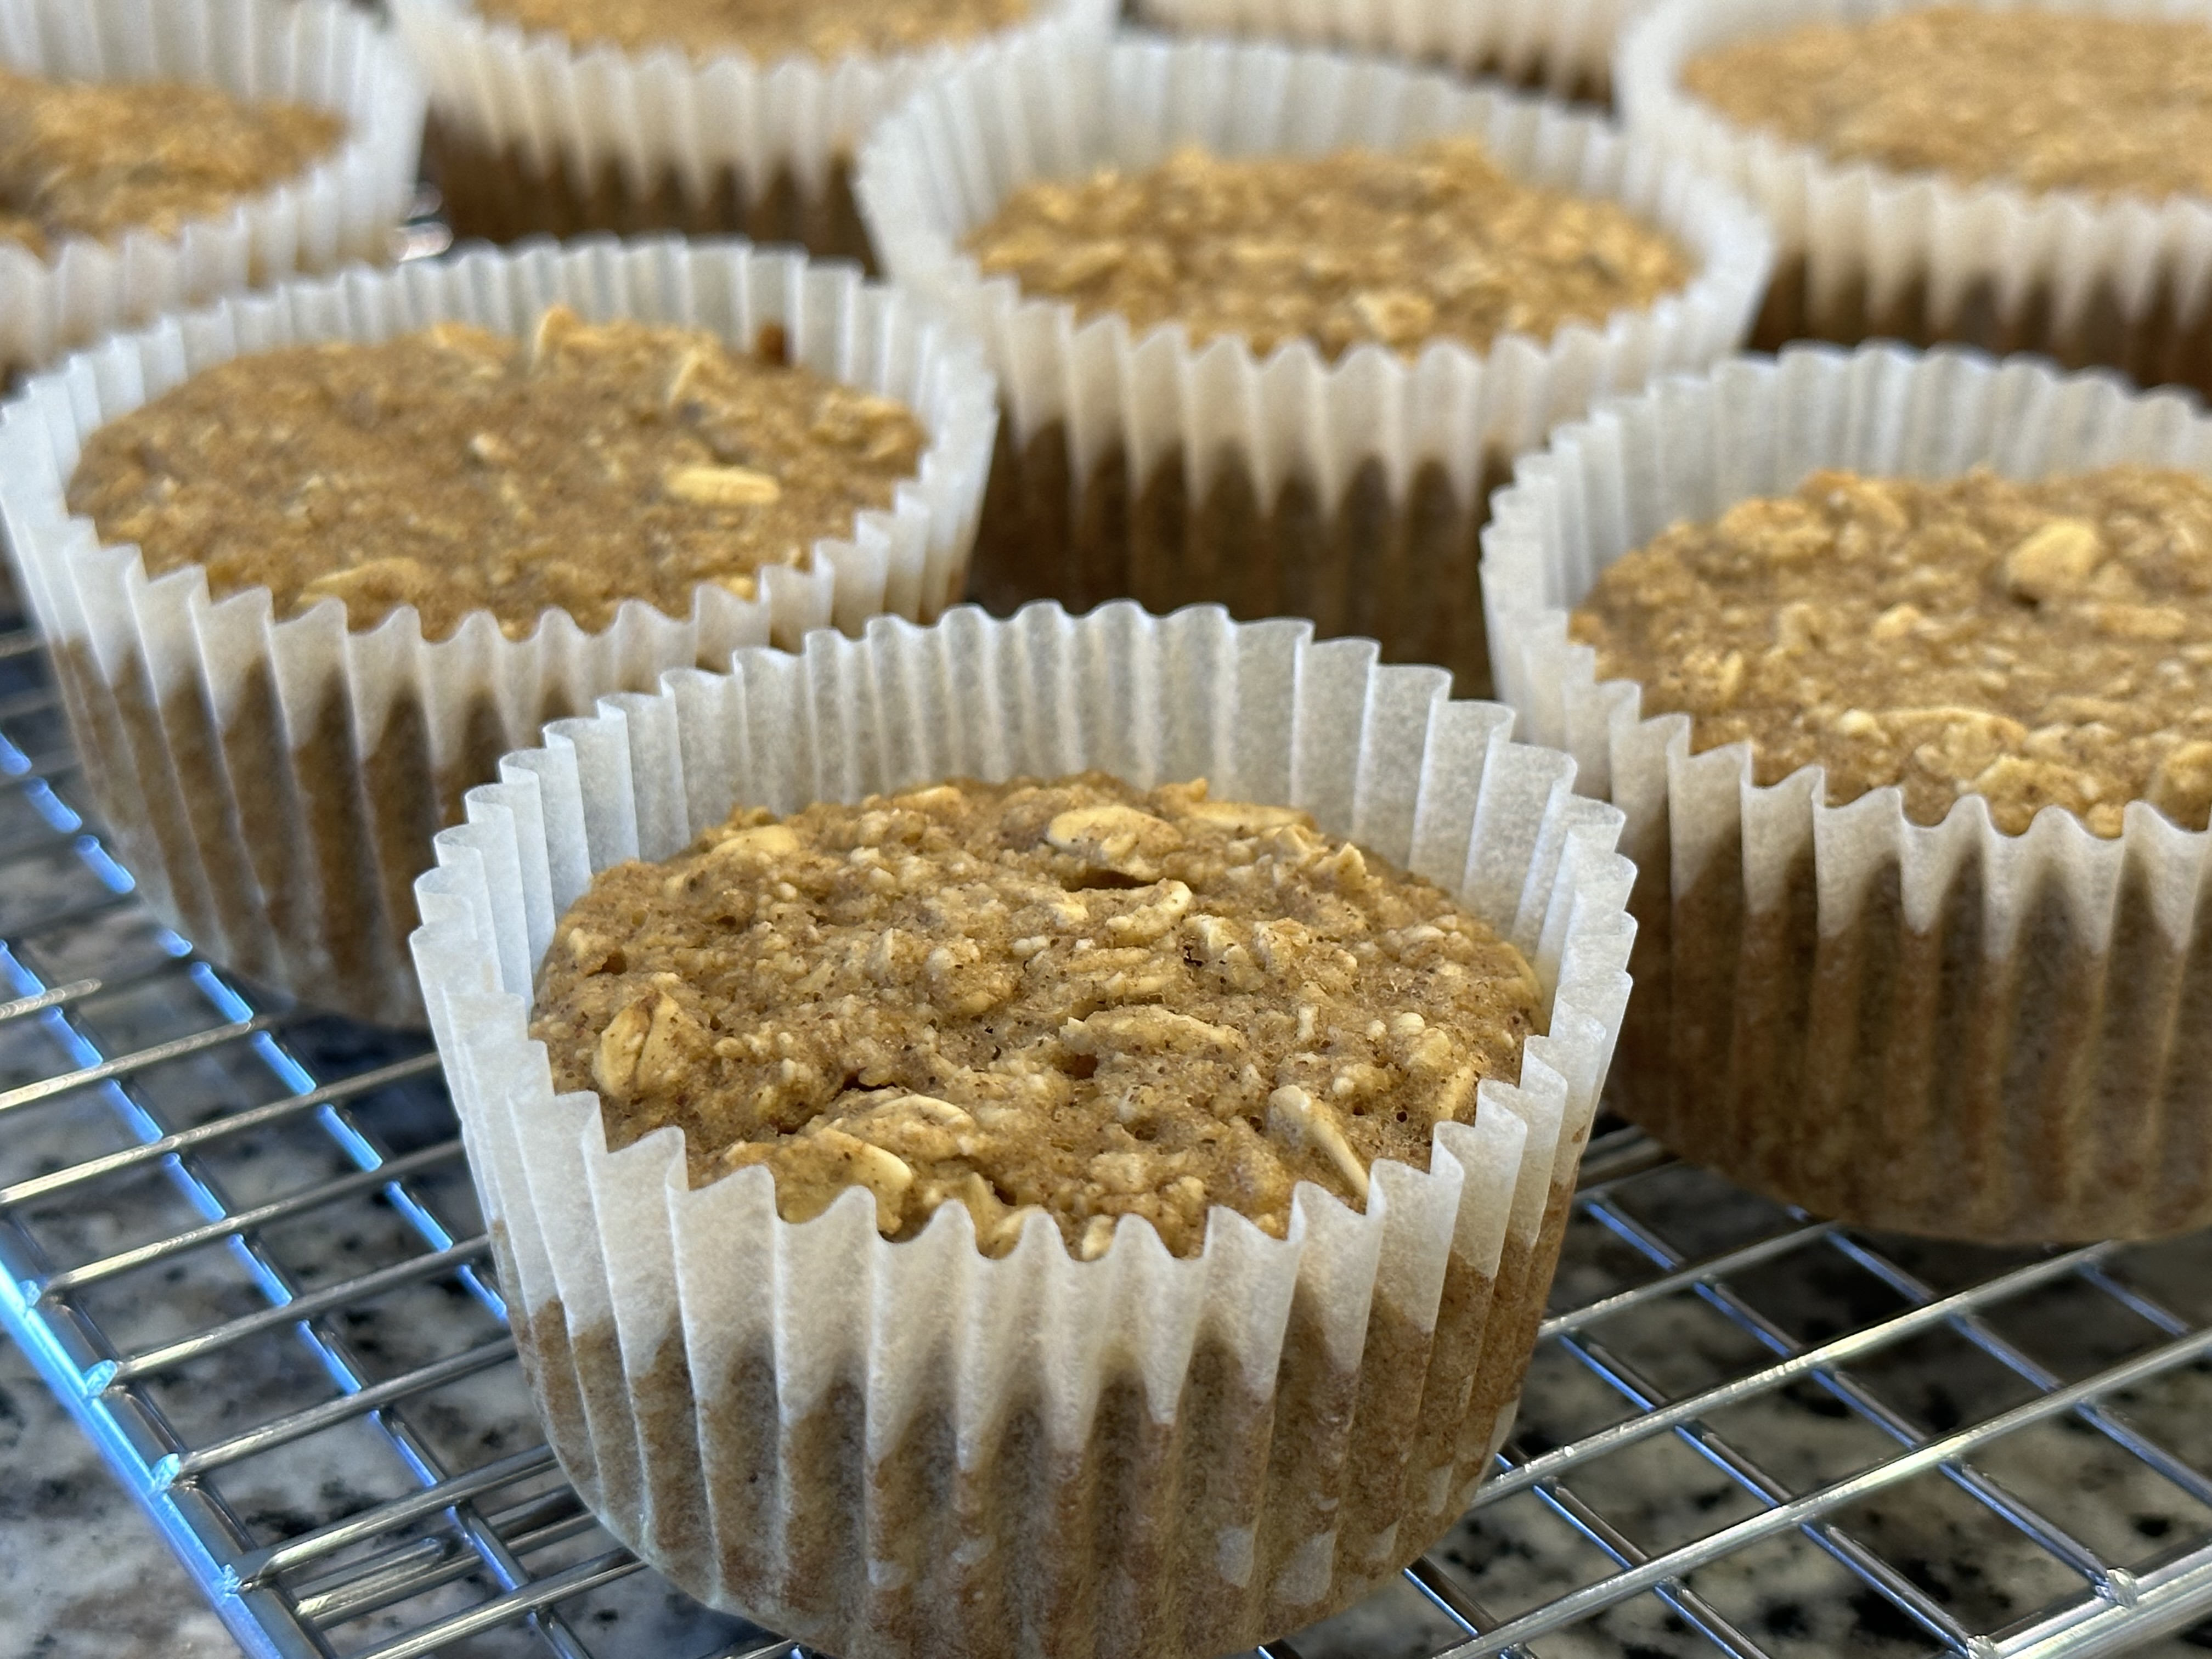
These are super tasty muffins that are my go-to muffin when I need a quick grab-and-go breakfast. They do not have any flour or refined sugar in them. Don't let that scare you! They are moist, delicious and filling. Even my hubby loves them!


Ingredients:

  • 2 1/2 cups old fashioned oats (divided)
  • 1 cup natural unsweetened applesauce
  • 1/3 cup pure maple syrup (you can use honey as well, but will have added calories)
  • 3/4 cup skim milk (if you don't want to use dairy, you can sub unsweetened oat or almond milk)
  • 1 tsp vanilla
  • 2 tsp baking powder
  • 1/2 tsp baking soda
  • dash salt
  • 1 tsp ground cinnamon
Directions:
  1. Preheat oven to 350 degrees F. Line muffin pan with parchment baking cups (keeps muffins from sticking to the papers). I use a 12 hole pan and a six hole pan.
  2. Grind 1 1/2 cups of the oats in a food processor until it resembles flour. Set aside.
  3. In a large mixing bowl, combine the applesauce, syrup, milk, and vanilla. Stir until well combined (I use a whisk).
  4. Add in the ground oat "flour", the remaining oats, the baking powder, baking soda, salt and cinnamon. Stir together until combined. 
  5. Let the mixture rest for about 10 minutes to allow the oats to absorb some of the milk.
  6. Scoop batter into muffin cups (divide equally among the 18 cups).
  7. Bake for 20-25 minutes until toothpick comes out clean.

Makes 18 servings of 1 muffin

Nutrition info from My Fitness Pal


Recipe modified from Big Green House