We had a fabulous weekend camping at Big Spring in Van Buren, MO. It is my favorite camping spot in the whole state. The weather was perfect - highs of 80 and lows in the mid 50s. I couldn't have asked for better. We got to hike, float, and eat lots of great camping food. Life is good when you camp. :) Even though school is officially out, I actually start my round of summer eMINTS training this week and Corey starts cross country practice, so we will still be very busy with school stuff. Because the weather is going to be nice and warm, and I'm going to be a tad busy, I needed easy dinners this week. So, this week is going to be grilling week. We grill a lot in the summer anyway, but this week it's going to be an everyday occurance. I needed to use the meat I have in my freezer as I didn't have time to make a big grocery store run. The good thing is that grilling is fast, easy, tastes great, and is pretty healthy. Here's this week's menu. Lots of the recipes are new, so pictures will be posted after I make them. For more menu ideas, see orgjunkie.com. Enjoy!

Sunday - Rotisserie Chicken, Mashed Potatoes, Oven Roasted Asparagus, Basil Green Beans
Monday - Grilled Honey Mustard Pork Chops, Salad, Pineapple, Green Beans
Tuesday - Grilled Honey Balsamic Chicken, Broccoli, Salad, Peaches
Wednesday - Filets, Cheddar Potato Strips, Snow Peas, Salad
Thursday - Chili Ranch Grilled Pork, Marinated and Roasted Vidalia Onion Rings with Parmesan, Baked Beans, Salad
Friday - Eric & Cindy date night
Saturday - Grilled Hamburgers, French Fries, Salad, Strawberries

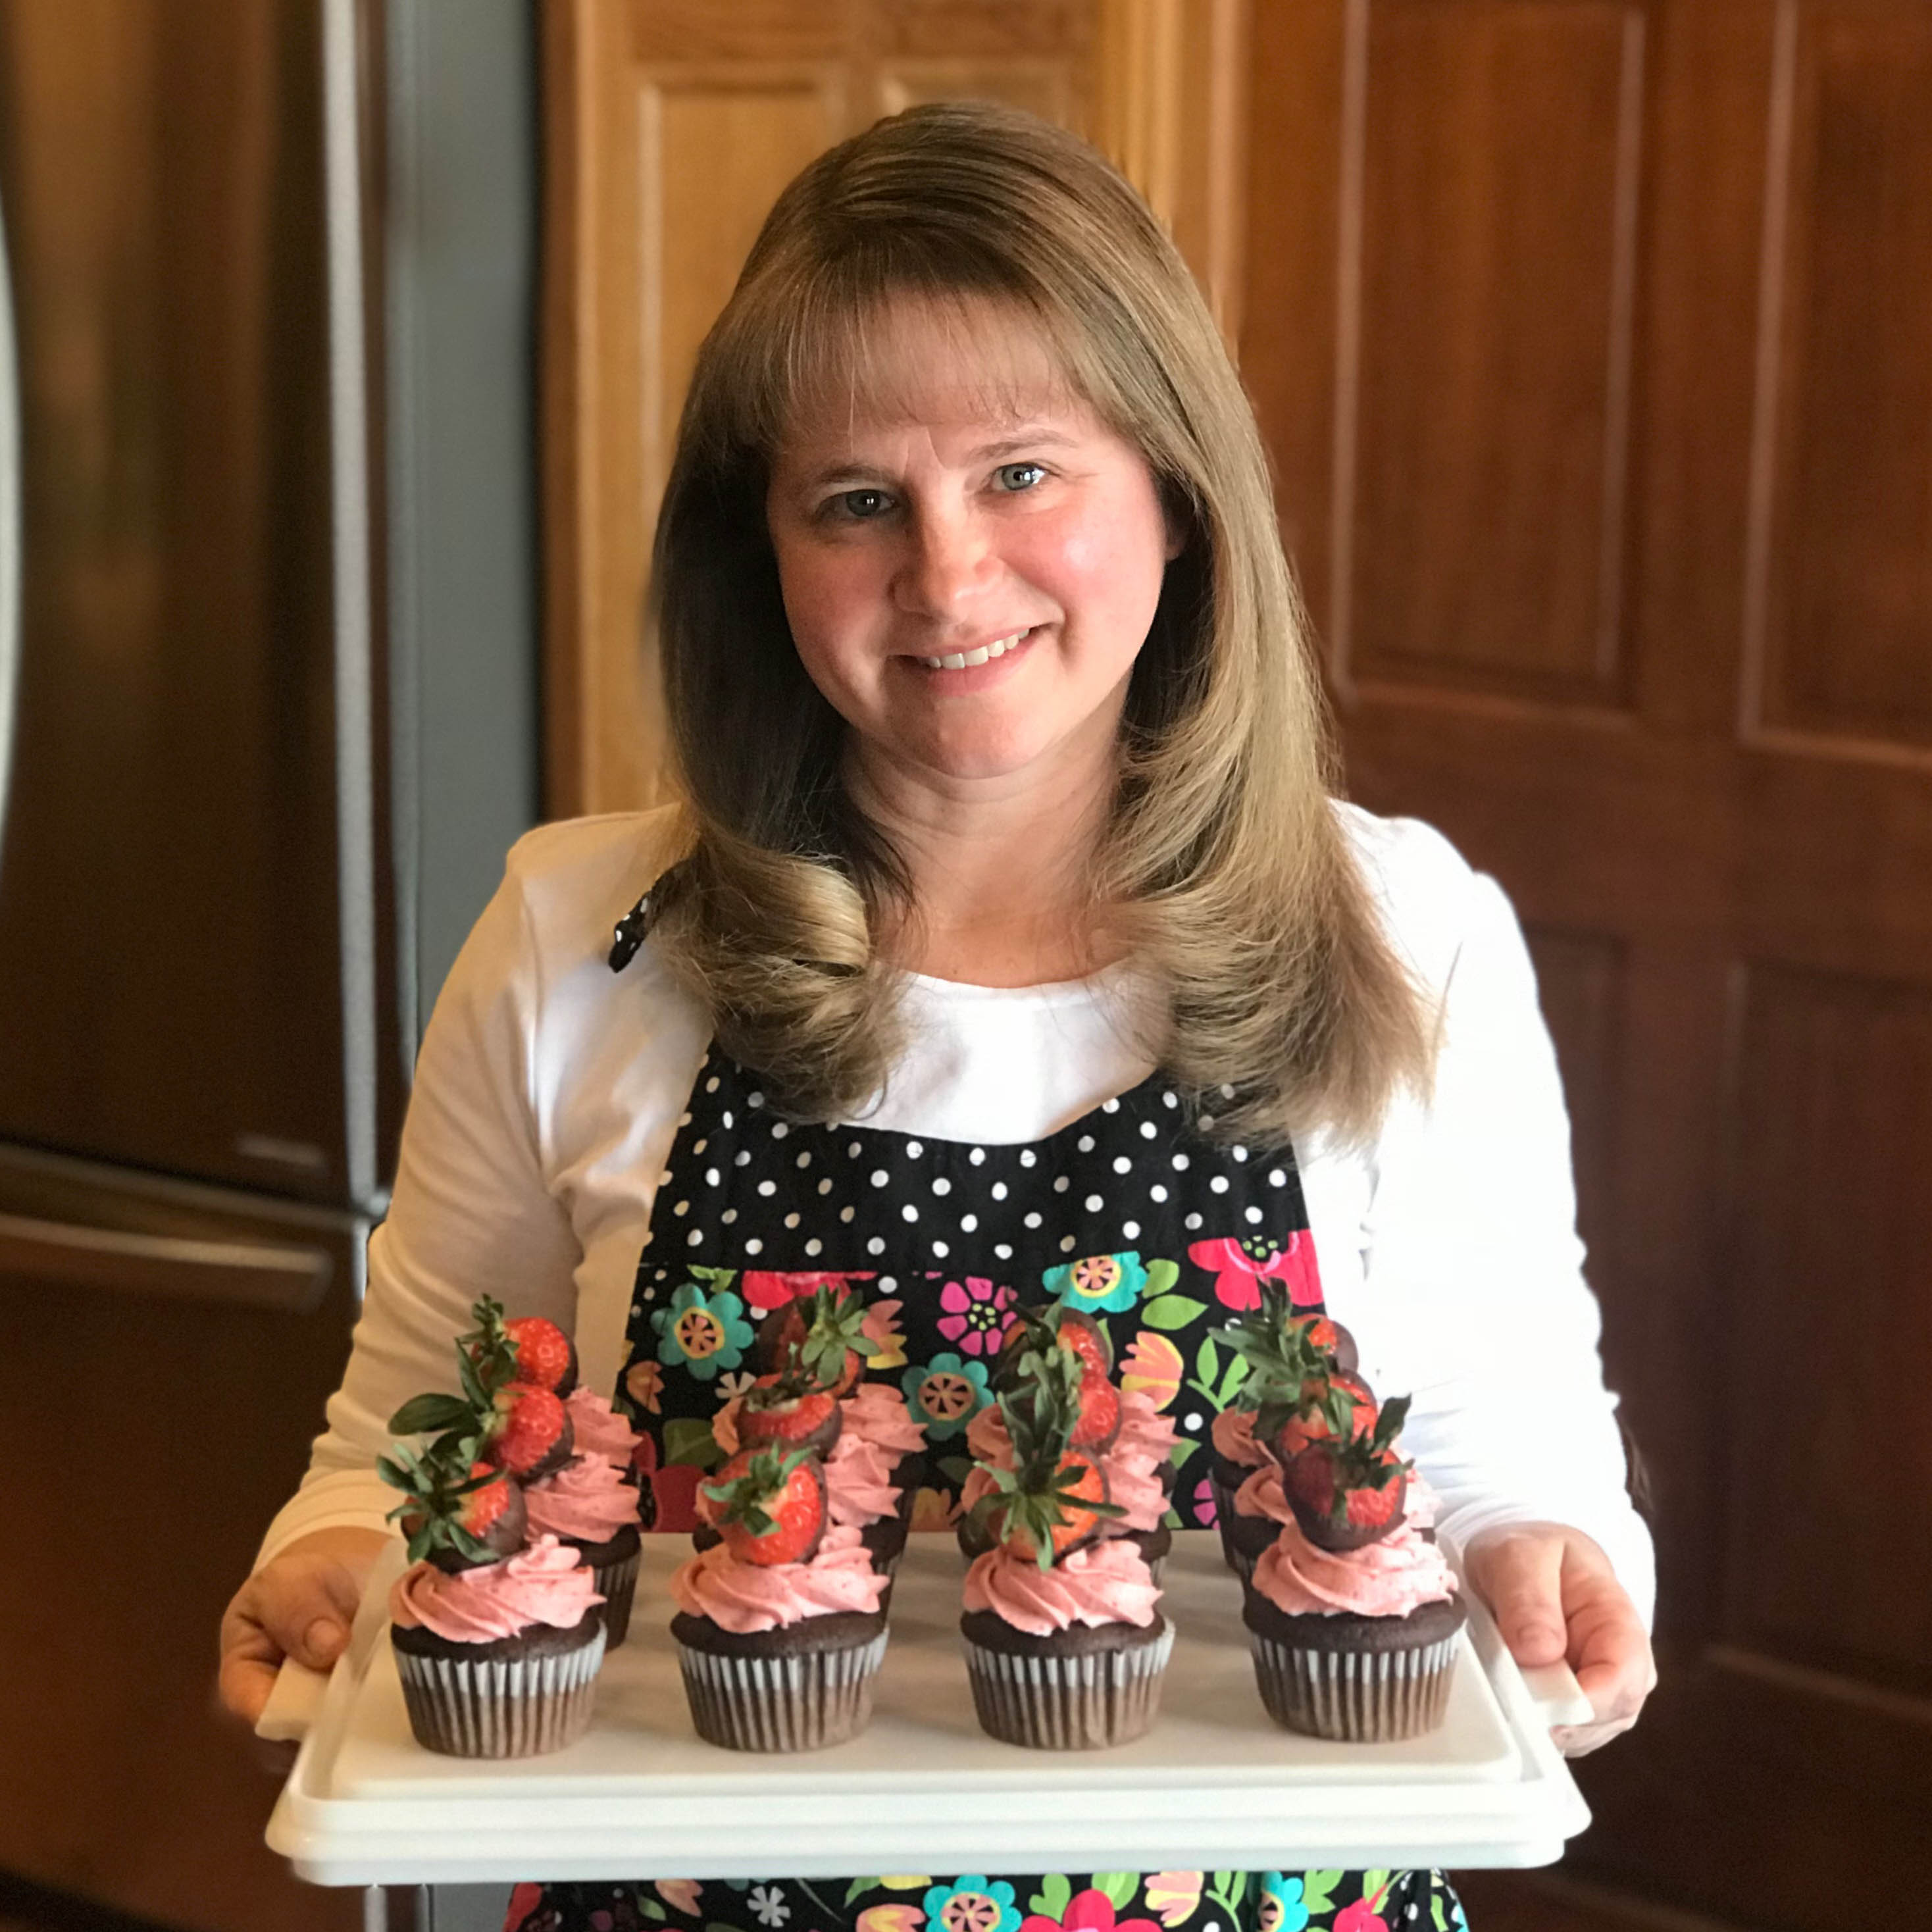
I think I like these more than the pops. They look really impressive. Just like the Cupcake Pops recipe, be sure to go to the Bakerella site to see pictures on how to make these.

Ingredients

1 box cake mix (cook as directed on box for 13 X 9 cake)
1 can cream cheese frosting (or vanilla) (16 oz.)
1 package chocolate bark (or candy melts for cupcake bottom)
Colored Candy Melts (for cupcake top)
Candy Cup Mold (looks like a peanut butter cup mold)
Sprinkles and M&Ms for decoration

Directions
1. After cake is cooked and cooled completely, crumble into large bowl. (The texture should be fine/fluffy)
2. Using the back of a large spoon, mix thoroughly with 1 can cream cheese frosting. (It may be easier to use fingers to mix together, but be warned it will get messy.)
3. Roll mixture into quarter size balls (make sure they are smaller in diameter than that of your candy mold) and lay on wax paper covered cookie sheet.
4. Chill in the freezer for a few minutes, until they are slightly firm, not frozen.
5. Melt chocolate bark and candy melts in microwave per directions on package.
6. Using a spoon or squeeze bottle, fill each mold cavity with a small amount of chocolate. But as soon as you fill the cavity, go ahead and place one of your rolled balls into it. Carefully push it down until the force causes the chocolate to push up and fill in around the sides of the ball. You may have to experiment with a couple to get the right amount. Stop pushing once the chocolate reaches the top edge.
7. Place the mold tray filled with cupcakes in the freezer for just a few minutes to let the chocolate set. Remove and then gently pull up on the cake ball top to release from candy mold.
8. Now, holding the bottom of the cupcake, dip the top in another color of melted chocolate.
9. Decorate.
10. And, probably impress your friends and family.
Makes about 50. Store in an airtight container and they will last for several days.

Recipe Source - Bakerella

These are simply the cutest treats! They aren't really hard to make, but they do take some time. It's a great Saturday project. :) If you decide to make these, be sure to go to the Bakerella site. She has pictures and a video that will really be helpful. I posted the recipe here more for myself as a backup and a reminder. I think the cupcake bites are even easier to make than the pops, and they still look very impressive and taste great. (My personal notes on this project are in italics.)

Ingredients and Supplies
1 13X9 baked cake (from a box cake mix or from scratch … any flavor)
1 can cream cheese frosting (or about 2 cups equivalent from scratch) - I used vanilla frosting and they were still good
1 flower shaped cookie cutter (1.25" wide X .75" tall)
1 package chocolate bark
1 package pink candy melts or white chocolate bark
bowls for dipping
wax paper
aluminum foil
lollipop sticks
sprinkles, m&ms or something similar for top of cupcake
small plastic treat bags and ribbon to package the Cupcake Pops
styrofoam block

Directions
1.Bake a cake from a mix or from scratch and cool completely.

2.Crumble cake into a fine consistency into a large bowl.
TIP: If the texture is too coarse, you can run it through a food processor. (I did not need to do this - if the cake is cool, it should crumble easily.)

3.Add can of cream cheese frosting (or vanilla) or homemade frosting and blend together using the back of a large spoon. Blend thoroughly.

4. Roll mixture into 1.25" - 1.5" size balls and lay on wax paper covered cookie sheet. You may want to periodically rinse and dry your hands off in between. (I used a small, Pampered Chef cookie scoop which helped keep the balls the same size.)

5. Cover with aluminum foil or plastic wrap and chill in refrigerator for several hours.
TIP: You can speed this up by placing in the freezer for about 15 minutes. (I put mine in the freezer for about 30 minutes, which worked great.)

6. Remove. Begin to shape into cupcakes using a small flower-shaped cookie cutter. Take the chilled ball and roll it into more of an oval and then slide into cookie cutter. Push it into cutter until about half fills the cutter and the rest sticks out of the top in the shape of a mound. Then push the shaped cupcake carefully out of the cookie cutter from the bottom. Set right side up on a wax paper covered cookie sheet. Continue with remaining balls. (If you don't have a small crinkle-cut cookie cutter, just use your hands to form the cupcake shape.)

7. Once shaped, cover and return to freezer. (5-10 minutes)

TIP: You can leave them covered in the refrigerator overnight if you want to do the dipping on the following day.

8. While cupcake shapes are chilling, begin to heat up your chocolate bark according to package directions.

You will use chocolate bark for the bottoms, and pink or white (or whatever color you like - I did half pink and half yellow) chocolate for the tops.

10. Follow the instructions on the package for melting. Most recommend heating for 30 second intervals at a time and stirring in between. You can also do the double boiler method.

11. When you are ready to dip, remove from freezer and set up another wax paper covered cookie sheet.

12. Take the cupcake shaped mixture and dip bottoms into the melted chocolate - just to the point where the mounded shape starts. Remove from chocolate, turn upside down and wiggle so that the excess starts to slide down slightly. Then lay on the wax paper upside down. If you want them to be lollipops, then go ahead and insert the lollipop sticks while the chocolate is still wet. Continue with rest of the cupcakes. You can also leave some without the sticks. They’re just as cute as Cupcake Bites.

TIP: Dip end of your lollipop stick in the melted chocolate before inserting into chocolate bottoms. Not sure if this helps a lot, but it couldn't hurt.

DON'T - get water in the chocolate. Make sure your hands are completely dry. Water will cause the chocolate to separate and mess up all your hard work.

13. Dry completely. (15-20 minutes)

14. Once dry, dip the tops of the cupcakes in the pink or white chocolate. You may need to move it around a little to cover all the exposed areas.

TIP: Let the pink chocolate sit for a few minutes after heating to thicken. This will help it from dripping down the sides of the cupcake.

15. Remove from the pink/white chocolate and turn right side up. You may need to hold and rotate it if there is any excess so that it doesn’t drip down too far.

TIP: You can use a toothpick to help cover any areas the melted chocolate didn't cover.

16. For the Cupcake Bites - just turn right side up and rest on the wax paper. Then go ahead and put a m&m on the top and add sprinkles while wet.

17. For the lollipops, continue holding and place an M&M on the top and add sprinkles. Let them dry in a styrofoam block that you have already poked holes into.

18. When completely dry, cover the lollipops with small plastic treat bags and tie with a ribbon.

Makes about 50. (Mine actually made more than 50)

You can store these in an airtight container and they will last for several days. You can also store in the refrigerator if you would like them cold.

Ingredients
3 T honey
2 t Dijon mustard
1 tablespoon orange juice
1 teaspoon chopped fresh tarragon leaves or 1/4 teaspoon dried tarragon leaves
1 teaspoon cider vinegar
1/2 teaspoon white wine vinegar
1 dash of onion powder
3 4 oz lean boneless pork chops
Directions
1. Heat coals or gas grill for direct heat. Mix all ingredients except pork in small bowl.
2. Cover and grill pork 4 to 5 inches from medium heat 10 to 12 minutes, brushing occasionally with honey mixture and turning once, until pork is slightly pink in center. Discard any remaining honey mixture.

Serves 3


Recipe adapted from Betty Crocker
Ingredients
4 medium-sized Vidalia onions or other types of sweet onions
2 T balsamic vinegar
1/4 tsp. seasoned salt
1/4 tsp. dried thyme
1/4 cup olive oil
1-2 T freshly grated Parmesan cheese
ground black pepper to taste

Directions
Peel onions, cut in to slices about 1/2 inch (1.25 cm) thick, and separate into rings. Put onion rings into a large Ziploc bag.
In a small bowl, stir together balsamic vinegar, seasoned salt, and dried thyme. Whisk in olive oil. Pour marinade into plastic bag and let onions marinate in the refrigerator 4 hours or longer, turning a few times if you're home.

Preheat oven to 400 F/200 C. While oven preheats, drain onions in a colander placed in the sink. Spray non-stick baking sheet with olive oil or non-stick spray. Arrange onions on baking sheet, putting them in a single layer as much as you can.

Roast onions 30-40 minutes, turning about every 10 minutes. Onions are done when they are nicely browned, especially on the edges. Remove onions to serving dish, sprinkle with Parmesan cheese, season to taste with ground black pepper and serve hot.

Recipe adapted from one at Kayln's Kitchen
These are incredibly tasty and easy to make.

Ingredients
3 boneless pork loin chops, 3/4 inch thick (4 oz each)
2 tablespoons Hidden Valley Ranch Ligh dressing

1/2 teaspoon chili powder
1/4 teaspoon dried thyme leaves
1/4 teaspoon garlic powder

Directions
1. Heat gas or charcoal grill. Place pork chops in shallow dish. Brush dressing over both sides of pork chops. Cover and refrigerate 15 minutes.
2. Meanwhile, in small bowl, mix remaining ingredients.
3. Sprinkle half of seasoning mixture over one side of pork chops. Place pork on grill, seasoned side down. Sprinkle remaining seasoning mixture over pork. Cover and grill over medium heat 8 to 10 minutes, turning once, until pork is no longer pink and meat thermometer inserted in center reads 160°F.

Recipe Source – Betty Crocker


What a wonderful Memorial Day Weekend! I actually was able to turn this into a 5-day weekend for myself. I have never taken my personal days at school, and because my summer is going to be very minimal this year due to computer trainings and my library extended contract (I will end up with about a week and a half off), I decided to use them this year. I took off Thursday and Friday last week, which was nice because I got to go to Corey's honors assembly at the high school. He got the geometry award - as an 8th grader! Pretty cool stuff! We also refinanced our house and had our closing (way to go budget-conscious hubby!), so this was a great time for me to take those extra days off. I did get a little time for me on Friday and went to the mall all by myself to look for girl clothes and I went to the fabric store. :)

We were very productive this weekend. We got all of our errands done on Friday evening, we replanted the garden (I think we are jinxed on actually growing stuff), and we had a marathon cooking day (made 8 dozen cookies, 4 lasagnas, lots of muffins, and two cakes). It feels great to have some stuff in the freezer. The best part is we still have one more day off tomorrow! I love long weekends.

This week is our last week of school. We get out early on Thursday, and then we are going camping. I can't wait! You'll see lots of new recipes posted this week due to my cooking marathon. Be sure to check out the raspberry buttermilk cake and the 7-up bundt cake. I posted the recipe for the cereal cookies I made last week for the American Idol party, and you'll see a new muffin recipe that I used to make some muffins for the teachers at school this week. Here's this week's menu. Enjoy! For more menu ideas, go to orgjunkie.com.

Sunday - Chicken Parmesan Burgers, Salad, Fresh Pineapple
Monday - Lasgana, Salad, Garlic Bread
Tuesday - Leftovers
Wednesday - Croque Monsieur (sandwiches), Good for You Tomato Soup, Salad
Thursday - Camping - Chili Dogs
Friday - Camping - Pork Tenderloin
Saturday - Camping - Frito Pie


Ingredients
1 box lemon cake mix
1 box 3.4 ounce box instant lemon flavored pudding mix
1 1/2 cups 7-up
4 eggs
3/4 cup vegetable oil

Directions
In a large bowl, mix all ingredients until smooth. Pour into greased and floured 10 inch fluted cake pan and bake at 325 degrees for about 45 to 50 minutes or until set. Let cool and remove from pan and place on a wire rack. Drizzle with lemon icing. (confectioner’s sugar and lemon juice mixed until smooth)

Recipe Source - Stephanie's Kitchen
Makes 15 muffins.


Ingredients
2 cups flour
2 teaspoons baking powder
1/2 teaspoon baking soda
3 1/2 ounces instant vanilla pudding (I use sugar free)
2/3 cups brown sugar
1 egg, beaten
1 cup sour cream (I use fat free)
1 8-ounce can crushed pineapple, with juice
1/2 cup oil

Directions
Preheat oven to 425 degrees. Spray muffin cups with nonstick cooking spray.

In a large bowl, sift together the flour, baking powder, baking soda, pudding mix, and stir in brown sugar.

In a separate bowl, combine the egg and sour cream. Fold in the pineapple and oil. Add the egg-pineapple mixture to the flour mixture, stirring until moistened. Batter will be thick.

Bake for 15 minutes.

I know everyone has their favorite lasagna recipe and that you probably don't need me to post another one, but this is the one I use and like, so I'm putting it here for me. :) It's simple and kid friendly because it doesn't have "chunks" as my son would say or "weird green stuff".


Ingredients
1 pound lean ground beef
2 T parsley
2 6 oz cans tomato paste
1 clove minced garlic
1 T basil
2 16 oz. cans tomato sauce
10 ounces lasagna noodles
3 cups cottage cheese
2 eggs, beaten
1 t salt
½ t pepper
2 T parsley
½ c parmesan cheese
1 pound mozzarella cheese, sliced

Directions
Brown meat, add next 5 ingredients and simmer until sauce is thick. Cook noodles according to package directions and rinse in cold water. Mix cottage cheese with next 5 ingredients (I usually mix this in a blender so it's smooth). Place ½ noodles in baking pan, layer ½ cottage cheese mixture, place a layer of mozzarella, then a layer of sauce. Repeat layers. Bake at 375 degrees for 30 minutes.

Recipe source – Mary Mael
You can make these with either frosted flakes or rice crispies. When I make them with frosted flakes, I don't do the chocolate layer on top.


(Sorry for the bad photo - my camera is broken and I had to take this with my hubby's iPhone)

Ingredients
1 cup sugar
1 cup corn syrup
1 cup creamy peanut butter
4-6 cups cereal (rice crispies or corn flakes)
½ bag butterscotch chips
½ bag semi-sweet chocolate chips

Directions

1.In small sauce pan, heat sugar and corn syrup until mixture comes to a boil.
2.Remove from heat and stir in 1 cup of peanut butter until melted.
3.In large mixing bowl, combine heated mixture and 4-6 cups rice crispies or corn flakes.
4.Press into 9x13 pan (spray with no-stick spray)
5.Melt ½ bag of butterscotch chips and ½ bag of semi-sweet chocolate chips. Pour over bars.

Ingredients
1 tablespoon olive oil
1 onion, chopped
2 carrots, peeled and chopped
3 cloves garlic, chopped
2 (14 ounce) cans Italian style diced tomatoes, undrained
2 cups chicken broth or stock
pinch of red pepper flakes
1 teaspoon balsamic or red wine vinegar
1 teaspoon honey
3/4 cup evaporated skim milk, or 4 ounces 1/3 less fat cream cheese
chopped fresh basil or parsley for serving

Directions
In a large pot, heat oil over medium high heat. Add onion and carrots and saute for five minutes. Stir in garlic and saute an additional minute. Add tomatoes, broth, red pepper flakes, vinegar, and honey. Season to taste with salt and pepper. Bring to a boil; cover, reduce heat to medium and simmer for 20 minutes, or until all vegetables are tender. For a creamy soup, transfer to blender and blend, or use an immersion blender directly in the pot. (Immersion blenders are a must have for soup lovers!) Soup can be made up to 2 days ahead of time to this point. Just before serving, add evaporated skim milk (or cream cheese of half and half) to pot. Warm through, but do not boil. Serve immediately

Recipe Source - Prudence Pennywise

(Sorry for the bad photo - my camera is broken and I had to take this with my hubby's iPhone)

Makes 18 muffins (I actually got 24 out of the recipe)

Ingredients
4 cups flour
1/2 cup sugar
2 tablespoons baking powder
1/2 cup shortening (can use 1/4 cup shortening with 1/4 cup butter)
2 cups orange marmalade
1 cup orange juice
1 teaspoon vanilla
2 eggs, beaten

Topping:
3/4 cup sugar
1 teaspoon cinnamon
1 teaspoon nutmeg
1 tablespoon plus 1 teaspoon melted butter
1/4 teaspoon salt
wheat germ (optional)

Directions
Preheat oven to 375 degrees.

Sift together flour, sugar, and baking powder. Place in a mixing bowl.
Use a pastry cutter to mix in shortening (or butter/shortening if desired).
Mix marmalade, orange juice, and vanilla in a small bowl. Pour into dry ingredients.
Beat eggs and pour into the bowl.
Mix all ingredients together gently, using fewer than 10 large strokes.

In a small bowl, mix topping ingredients.

Fill muffin pans with batter. Sprinkle 1 heaping teaspoon of topping ingredients over each muffin.

Sprinkle wheat germ over the top for extra crunch.

Bake for 20 to 22 minutes until done. Remove from pan and cool on wire rack. Eat warm or at room temperature.

Recipe Source - Pioneer Woman

Ingredients

2 tablespoons unsalted butter
3 tablespoons all-purpose flour
2 cups hot milk
1 teaspoon kosher salt
1/2 teaspoon freshly ground black pepper
Pinch nutmeg
12 ounces Gruyere, grated (5 cups)
1/2 cup freshly grated Parmesan
16 slices white sandwich bread, crusts removed
Dijon mustard
8 ounces baked Virginia ham, sliced but not paper thin

Directions

Preheat the oven to 400 degrees F.

Melt the butter over low heat in a small saucepan and add the flour all at once, stirring with a wooden spoon for 2 minutes. Slowly pour the hot milk into the butter–flour mixture and cook, whisking constantly, until the sauce is thickened. Off the heat add the salt, pepper, nutmeg, 1/2 cup grated Gruyere, and the Parmesan and set aside.

To toast the bread, place the slices on 2 baking sheets and bake for 5 minutes. Turn each slice and bake for another 2 minutes, until toasted.

Lightly brush half the toasted breads with mustard, add a slice of ham to each, and sprinkle with half the remaining Gruyere. Top with another piece of toasted bread. Slather the tops with the cheese sauce, sprinkle with the remaining Gruyere, and bake the sandwiches for 5 minutes. Turn on the broiler and broil for 3 to 5 minutes, or until the topping is bubbly and lightly browned. Serve hot.


Makes 8 sandwiches

Recipe Source - Ina Garten

Ingredients
1 cup all-purpose flour
1/2 teaspoon baking powder
1/2 teaspoon baking soda
1/4 teaspoon salt
1/2 stick unsalted butter, softened
2/3 cup plus 1 1/2 tablespoons sugar, divided
1/2 teaspoon pure vanilla extract
1 large egg
1/2 cup well-shaken buttermilk
1 cup fresh raspberries (about 5 oz)

Directions
Preheat oven to 400°F with rack in middle. Butter and flour a 9-inch round cake pan.

Whisk together flour, baking powder, baking soda, and salt.

Beat butter and 2/3 cup sugar with an electric mixer at medium-high speed until pale and fluffy, about 2 minutes, then beat in vanilla. Add egg and beat well.

At low speed, mix in flour mixture in 3 batches, alternating with buttermilk, beginning and ending with flour, and mixing until just combined.

Spoon batter into cake pan, smoothing top. Scatter raspberries evenly over top and sprinkle with remaining 1 1/2 Tbsp sugar.


Bake until cake is golden and a wooden pick inserted into center comes out clean, 25 to 30 minutes. Cool in pan 10 minutes, then turn out onto a rack and cool to warm, 10 to 15 minutes more. Invert onto a plate.

Recipe Source - Gourmet

(Sorry for the bad photo - my camera is broken and I had to take this with an iPhone - they really do look much better than this)

Ingredients
1 lb. ground chicken (I used breast meat)
1/4 cup grated parmesan cheese
1/4 cup plain bread crumbs
2 tsp. Italian seasoning
1/4 cup chopped flatleaf parsley
1 clove garlic, finely minced or pressed
1 shallot, finely diced
salt and pepper

1/2 cup pasta sauce
4 slices mozzarella or provolone (or 1/2 cup shredded)
sautéed mushrooms (optional)
4 buns (brushed with a little garlic butter, they are even better)

Directions
Lightly mix together all the ingredients for the burgers. Form into 4 patties. Making them about 30-40 minutes ahead of time lets the flavors meld a little bit.

Preheat & spray the broiler with a little oil (or use the grill, or a pan). Broil the burgers for
about 4 minutes on the first side, then flip and broil for 3 minutes. - I prefer to grill mine on the grill instead of use a broiler.

Top each chicken burger with 2 Tbsp. pasta sauce and a slice (or about 2T) of cheese. Place
back under the broiler for 30-60 seconds, until cheese in melted and burger is cooked
through. Top with mushrooms, if desired.

Place the buns in the broiler for about 10 seconds, just until toasted.

Serves 4

Recipe Source - Elly Says Opa

Let the sun shine! After three weeks of rain, we finally had a beautiful, sunny day today! The boys finally got to do their birthday rock climbing trip and had a great time. I went hiking with my parents, and then we went to watch the boys climb for a while. After having a rather busy, stressful week, today was just what I needed.

We are approaching the end of school (only 7 1/2 days left), so the schedule is still a little hectic. I have a computer workshop on Monday, Eric has some travel, Corey has quite a few evening meetings, and we are hosting two American Idol finals parties at our house. Here is our menu for the week. Enjoy! For more menu ideas go to orgjunkie.com.


Sunday - Grilled Cheese and Tomato Soup (just wanted something simple after hiking and climbing)
Monday - Chicken Alfredo (made ahead), broccoli, peaches
Tuesday - American Idol Party - I'm providing the main dish - Pulled Pork Sandwiches
Wednesday - American Idol Party - main dish again - Grilled Bacon Wrapped Stuffed Hot Dogs
Thursday - Out to eat - too many evening obligations
Friday - Taco Bake, Salad, Corn
Saturday - Ultimate BBQ Chicken, Green Beans Almondine, Salad, Strawberries (we were supposed to eat this last week but ended up grilling burgers instead)

Happy Mother's Day! I hope everyone had a wonderful day with their families today. I woke up with a rather annoying cold, but still had a great day. The boys made breakfast for me, I got to read for a while, and I took a very long nap. I also got to see the new Star Trek movie, which was awesome! We were originally supposed to go on a float trip, but the nasty weather and my health kind of blew that activity.

I had a friend ask me this week if I would share an example of my weekly planning form. So, here is an example. I've been using this for a couple of years, and it works great for me. I start off by listing my family's activities so I know what kind of meal to plan. If it's a night where we won't be home until late, I know that I need to either plan a crockpot meal or have something made ahead of time. I then list my dinner menu, and as I look at the recipe, I make my list of items I need to get at the grocery store.


Here are links to my templates if you would like to use them. Feel free to modify them to fit your needs.

Weekly Menu Plan - Word doc

Weekly Menu Plan - pdf

On with this week's menu. We do have a crazy week, so you'll see that I kept it pretty simple. I didn't get to the spaghetti last week, so it's back on for this week. For more menu ideas, go to orgjunkie.com. Have a great week!

Sunday - Manicotti with Cheese, Broccoli, Salad
Monday - leftovers or eat out with author
Tuesday - Crockpot Chicken and Stuffing, Basil Green Beans, Peaches
Wednesday - Beef Enchiladas, Salad, Corn
Thursday - Spaghetti with Meat Sauce, Salad, Cheese Garlic Bread
Friday - Homemeade Pizza, Salad
Saturday - Ultimate BBQ Chicken, Green Beans Almondine, Salad, Strawberries
This is my mother-in-law’s recipe, and it is simple and tastes great! It's also loaded with fiber - 9 grams per serving! I make a batch a freeze it in individual portions and bring it for lunch. :) There's no way to make pea soup look appetizing, but I went ahead and posted a picture anyway. It's an awesome soup.


Ingredients
1 pkg dried split peas
1 med. Onion, diced
9 cups water
1 tsp. salt
1 pork hock

Directions
Rinse peas in colander. Put in soup pot with water, onion, salt, and hock. Cook covered several hours until peas are soft (mushy).


I have some new readers to my blog after sharing my computer mom geekiness (is that a word?) with a local MOPS group, so I thought I should explain the method to my madness. :-)

You might wonder why I start my menu posts each week with highlights from my family's life. I do it for a couple of reasons. First, my mom and my mother-in-law read this blog and it's a quick way to let them know what we've been up to during the week. ;-) But, I also do it to show that we are normal people with busy lives just like everyone else. I often have people ask me if I ever sleep or how I have time to do things like meal plan. I do realize I am obsessive things (not everyone gets a kick out of photographing their dinner every night ), but I hope that by recapping my week for you, it shows you that planning meals can actually save you time. I base my meals on the activities we have each week. I'll post an example of my planning form later in the week to give you an example. So, on with my normal recap.

Well, it was another great week for the Matzat family. We celebrated Eric's birthday on Wednesday, which meant we got eat the best cake in the world! Eric's parents came to visit this weekend to celebrate Corey's confirmation at church. It was nice to have some family here to celebrate his special day. Our friends the Hunsakers also came to church today to help us celebrate.


This week is a busy one for us. I have eMINTS training on Monday and Tuesday, Corey has a band concert, boy scouts, NJHS induction ceremony, and a school dance, so our evenings are quite busy. Therefore, the meal plan focuses on fast and easy meals, things that can be made ahead, and crockpot items. We do have to eat out on Monday. I do have a couple of fun, new recipes for Cinco de Mayo, so check them out. For more menu ideas, go to orgjunkie.com.

Sunday - Brunch at the Keeter Center to celebrate Corey's Confirmation
Monday - Eat out (band concert & eMINTS training)
Tuesday - Chicken Fajitas, Touchdown Taco Dip, Margarita Cupcakes
Wednesday - Crockpot Cowboy Stew, Savory Mexican Cornbread
Thursday - Spaghetti with meat sauce, Salad, Cheese Garlic Bread
Friday - Leftovers
Saturday - Hamburgers on the grill, Baked Beans, Salad
Well, even though last year's garden wasn't the most successful, we decided to give it a try again this year. We even expanded to another box. Last year the horribly rainy spring really hurt us, and unfortunately, it's been raining ever since we got our garden planted this year. Hopefully we will get some sunny days soon. Here are some pictures to document our garden attempt. Wish us luck!


Ingredients:
1-1/2 cups (6 oz) shredded sharp Cheddar cheese (I use 2% milk kind)
3/4 cup buttermilk (fat free)
1/3 cup vegetable oil
2 eggs
1 can (8.5 oz) cream-style corn
1 can (4 oz) chopped green chiles (I left these out as I did not want this to be spicy this time)
1 cup cornmeal
1 cup all-purpose flour
1 teaspoon baking powder
1/2 teaspoon baking soda
1/2 teaspoon salt
Optional garnishes: Jalapenos, cilantro, honey and butter

In a large bowl mix cheese, buttermilk, vegetable oil, eggs, corn and green chiles.

In another bowl mix cornmeal, all-purpose flour, baking powder, baking soda and salt. Add to cheese mixture; stir just until dry ingredients are moistened.

Generously spray a 1-1/2 quart casserole dish with cooking spray. Pour mixture into casserole. Bake 40 to 50 minutes in a 375 degree oven or until cornbread is a deep golden brown and toothpick inserted in center comes out clean. Cooking times are going to vary based on width and height of the pan you use.

Cool in the pan 10 minutes and slice into wedges. Serve warm.

Drench in honey and butter if you desire.

Recipe adapted from Noble Pig
I made these for a Cinco de Mayo dinner party. They are very tasty, but you have to like lime flavor.


Ingredients:

1 box white cake mix
1 cup margarita Mix , room temperature
1/4 tequila, room temperature
3 egg whites @ room temperature
2 tablespoons vegetable oil
zest of 3 small limes or 2 medium limes

Directions:

1. Preheat oven to 350 degrees.

2. Prepare 2 muffin tins with cupcake papers (recipe yields 24 small cupcakes)

3. In a glass or small bowl, mix together the margarita mix and tequila. Make sure both are at room temperature to ensure smooth mixing with the rest of the ingredients.

4. In medium bowl (preferably with a pouring spout) whisk together the margarita mixture, 3 egg whites (also at room temperature for the same reason) and vegetable oil.

5. In large bowl or standing mixer, place the white cake mix and lime zest. Slowly incorporate the wet ingredients either with a hand mixer or standing mixer.

6. Beat mixture about 2-3 minutes. The batter will have a thick, tacky consistency.

7. Distribute the mixture evenly among the 24 cupcakes. Use a muffin scoop do so as pouring this thick batter might be a challenge.

8. Bake the cupcakes for 8 minutes, then rotate the pans to ensure even baking.

9. Bake at 350 an additional 8-10 minutes. Bake times can vary. They're done when you can pull out a clean toothpick from the center of a cupcake. To avoid over-baking, watch them carefully.

10. Remove from oven. Let sit in the tins for 5 minutes, then transfer to a cooling rack. Once completely cooled (1-2 hrs), ice with Lime Buttercream Frosting (see below).

Lime Buttercream Frosting

Ingredients:

3 cups sifted confectioner's sugar (be sure to measure it after sifting!)
1/2 cup (1 stick) salted butter, room temp
1/2 cup (1 stick) UN-salted butter, room temp
1 tablespoon fresh lime juice, room temp
green food coloring
a few pinches granulated sugar

Directions:

1. Using a stand mixer or a hand mixer, cream the two sticks of butter together.

2. Add fresh lime juice.

3. Slowly incorporate the sifted confectioner's sugar.

4. Mix until the icing is smooth.

5. Add green food coloring to your liking until you achieve a "lime" hue.

6. Ice the cupcakes using a star tip or plain, old butter knife.

7. Sprinkle granulated sugar on top of freshly iced cupcakes for a "salted rim" look. The sugar will also give them a nice sparkle.

Recipe adapted from Life of the Party
This is my adaptation of one of those Pampered Chef recipes you get when you host a party. It's pretty tasty, and my version is healthier than the original!


Ingredients:
1 can (16 ounces) fat free refried beans
1 package (8 ounces) fat free cream cheese, softened
1 cup fat free sour cream
2 tablespoons low sodium taco seasoning mix
2 garlic cloves, finely minced
2 ounces cheddar cheese, shredded (1/2 cup) (use the 2% milk kind)
1 medium tomato, seeded and diced
1/4 cup thinly sliced green onions with tops
2 tablespoons fresh cilantro or parsley, thinly sliced
Baked tortilla chips

Directions:

Preheat oven to 350 F.

Spread refried beans over bottom of a 9 inch glass pie plate (or other similarly sized baking dish).

In a bowl, combine cream cheese, sour cream, and taco seasoning. Finely chop garlic. Add to bow and mix well.

Spread cream cheese mixture evenly over beans. Grate cheese over top.

Bake 15-18 minutes or until hot.

To prepare toppings, dice tomato and thinly slice onions. Thinly slice cilantro. Sprinkle tomatoes, onions, and cilantro over dip. Garnish with additional sour cream, if desired. Serve with tortilla chips.